28th February 2023 (updated)
Next.js: Using HTTP-Only Cookies for Secure Authentication (2023)
Update: The example code for this post has been updated to use Next.js 13 and
getServerSideProps instead of getInitialProps.
Most modern REST and GraphQL APIs expect an authentication token as an HTTP header in order to identify the currently logged-in user.
That means the frontend application needs to store the user's auth token somewhere.
The Problem with localStorage and Normal Cookies
Many SPAs and Next.js apps simply keep their auth tokens in localStorage or just a normal cookie.
Unfortunately localStorage and simple cookies aren't the safest place to keep sensitive data because both can be accessed from third-party scripts and browser extensions.
In this post I will show you how to keep your JWT or other kind of auth token in an HTTP-only cookie with Next.js.
Why use HTTP-Only Cookies for Authentication?
HTTP-only cookies can't be accessed from client-side JavaScript, so third-party scripts and browser extensions won't even know they exist.
You can identify them by looking for the httponly attribute in the set-cookie header of an HTTP response:
set-cookie: auth-token=123; path=/; samesite=lax; httponly
Our own first-party JavaScript can't access HTTP-only cookies either though... so how do we get them into the HTTP headers of our API calls?
Enabling Cookie-Based Authentication with an API Proxy
Note: If your API supports authentication via cookies, it might be easy enough to create a simple API proxy with Next.js.
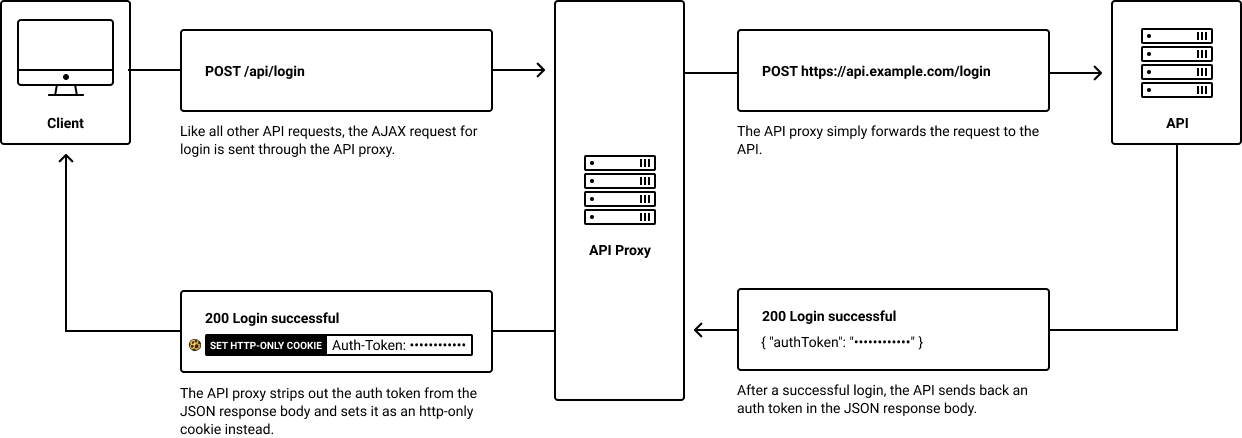
Instead of calling the API directly, our AJAX calls will go through an API Proxy – basically a thin layer in front of the actual API.
The API Proxy will exist on the same host/domain as our Next.js app and act as a sort of "translation layer". By existing on the same
domain as our Next.js app, it can access the same cookies. So it can read the HTTP-only auth token cookie and
"translate" it into an auth-token HTTP header that the API understands.
As a pleasant side effect, this also eliminates CORS issues, since the only AJAX requests we'll be making, will be to the same origin.
So how does this API Proxy work? It basically has two jobs:
1. Setting the Auth Token Cookie After Login
Whenever a user logs in, the API Proxy needs to intercept the API call for login and save an auth-token cookie from the API response.
2. Switching Out the Cookie for an HTTP Header
Most APIs don't accept cookies for authentication themselves so we'll have our API Proxy "translate" our authentication cookies into HTTP headers before forwarding our requests to the actual API.
Now that we've looked at how an API Proxy for HTTP-only auth token cookies works, let's implement it in Next.js.
Adding an API Proxy to Next.js
Thanks to Next.js' API catch-all routes, we can easily add the API proxy directly to Next.js itself without having to setup e.g. an Express server.
Pay attention to the name of the file we'll be creating: pages/api/[...path].js.
We'll be using two helpful packages from npm: http-proxy (lets us create a proxy server) and cookies (makes it easier to deal with cookies in Next.js). You can install them by running:
$ yarn add http-proxy cookies
Thanks to these packages, the actual API Proxy implementation isn't even 100 lines long.
pages/api/[...path].js
import httpProxy from 'http-proxy'import Cookies from 'cookies'import url from 'url'// Get the actual API_URL as an environment variable. For real// applications, you might want to get it from 'next/config' instead.const API_URL = process.env.API_URLconst proxy = httpProxy.createProxyServer()// You can export a config variable from any API route in Next.js.// We'll use this to disable the bodyParser, otherwise Next.js// would read and parse the entire request body before we// can forward the request to the API. By skipping the bodyParser,// we can just stream all requests through to the actual API.export const config = {api: {bodyParser: false}}export default (req, res) => {// Return a Promise to let Next.js know when we're done// processing the request:return new Promise((resolve, reject) => {// In case the current API request is for logging in,// we'll need to intercept the API response.// More on that in a bit.const pathname = url.parse(req.url).pathnameconst isLogin = pathname === '/api/login'// Get the `auth-token` cookie:const cookies = new Cookies(req, res)const authToken = cookies.get('auth-token')// Rewrite the URL: strip out the leading '/api'.// For example, '/api/login' would become '/login'.// ️You might want to adjust this depending// on the base path of your API.req.url = req.url.replace(/^\/api/, '')// Don't forward cookies to the API:req.headers.cookie = ''// Set auth-token header from cookie:if (authToken) {req.headers['auth-token'] = authToken}// In case the request is for login, we need to// intercept the API's response. It contains the// auth token that we want to strip out and set// as an HTTP-only cookie.if (isLogin) {proxy.once('proxyRes', interceptLoginResponse)}// Don't forget to handle errors:proxy.once('error', reject)// Forward the request to the APIproxy.web(req, res, {target: API_URL,// Don't autoRewrite because we manually rewrite// the URL in the route handler.autoRewrite: false,// In case we're dealing with a login request,// we need to tell http-proxy that we'll handle// the client-response ourselves (since we don't// want to pass along the auth token).selfHandleResponse: isLogin})function interceptLoginResponse(proxyRes, req, res) {// Read the API's response body from// the stream:let apiResponseBody = ''proxyRes.on('data', (chunk) => {apiResponseBody += chunk})// Once we've read the entire API// response body, we're ready to// handle it:proxyRes.on('end', () => {try {// Extract the authToken from API's response:const { authToken } = JSON.parse(apiResponseBody)// Set the authToken as an HTTP-only cookie.// We'll also set the SameSite attribute to// 'lax' for some additional CSRF protection.const cookies = new Cookies(req, res)cookies.set('auth-token', authToken, {httpOnly: true,sameSite: 'lax'})// Our response to the client won't contain// the actual authToken. This way the auth token// never gets exposed to the client.res.status(200).json({ loggedIn: true })resolve()} catch (err) {reject(err)}})}})}
With the API Proxy in place, we have everything we need to start using HTTP-only cookies for our auth tokens (JWT or otherwise) in Next.js.
Next Steps
In order to complete the story, we'll want to think about a few more things:
- We need to make sure all client-side API requests go to the proxy instead of the API directly
- We need a mechanism for logging out the user – either a "logout" page or an API endpoint we can call to unset the
auth-tokencookie. This needs to happen on the server somewhere because we also can't unset HTTP-only cookies from the client - On the server, e.g. during
getInitialProps()orgetServerSideProps(), we need to make requests to the API directly
Example App on GitHub
I've put up a self-contained example application on GitHub for you to check out.
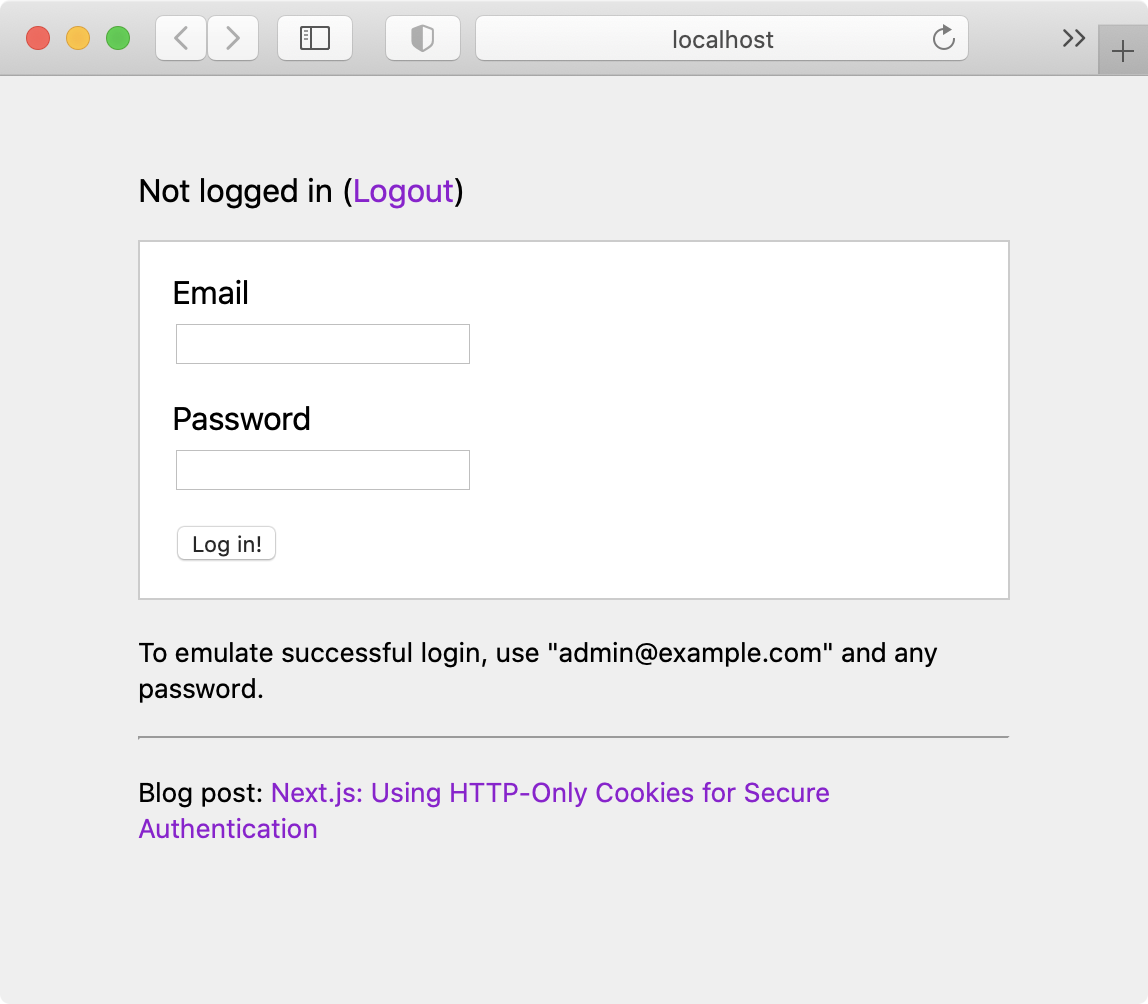
It contains the API Proxy from above, a demo login, as well as solutions for logout and server-side API requests.
Thanks to my friends Amal and Saša for proof-reading this article.

About the author
Hi, I’m Max! I'm a fullstack JavaScript developer living in Berlin.
When I’m not working on one of my personal projects, writing blog posts or making YouTube videos, I help my clients bring their ideas to life as a freelance web developer.
If you need help on a project, please reach out and let's work together.
To stay updated with new blog posts, follow me on Twitter or subscribe to my RSS feed.


